Voxengo Crunchessor
Primary User Guide (PDF): English, Français, Deutsch, Русский язык

Applications
- Dance and house kick drum processing
- Instrumental track compressor
- Vocal track compressor
- Side-chain compressor
- Stereo, mono, mid-side compressor
- 7.1, 5.1 surround sound compressor
- Clean-sounding compressor
- Smooth harmonic enhancer
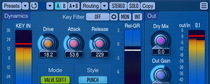
Crunchessor is a track compressor AAX, AudioUnit, and VST plugin for professional sound and music production applications. One of its main advantages is the ease of tuning, which at the same time instantly delivers an excellent sonic performance. Another remarkable feature of Crunchessor is its analog tube-alike processing, which is applied in parallel to compression. This makes Crunchessor an ideal choice for musicians and producers who are fond of analog compression sound and its warmness.
Beside this, Crunchessor offers you a selection of compression coloration styles, by itself a pretty unique feature for a compressor. By choosing an appropriate style, you can add the coloration most suitable for the sound material you are working with. As an option, you can disable both coloration and tube processing to get a neutral and clean compression sound.
Being a multi-purpose compressor, Crunchessor can be used for any kind of sound material: drums, vocals, bass, guitars, synth sounds, etc. Crunchessor can be suitable both for single track and whole mix processing. Crunchessor also accepts external side-chain source signals and allows you to filter the key signal before it is used for compression.